Hey everybody! Ben here! As you may or may not know, this session I am taking a Computer Modelling/Animation course! Get excited! :-) This is the class I've been looking forward to for this entire session, and already I'm loving it. I'm using Autodesk 3Ds Max for the software, which is extremely similar to VIZ, which I used to create my Ace of the Air animation in high school. Needless to say, this gives me a bit of an edge when it comes to completing the tutorials for the class.
For the past week, I've been experimenting with the software and completing the tutorials provided by the instructor. Attached are the final results of these exercises, complete with a description of the major tools used to create them.
Can you tell I'm having fun with this class? I hope it shows. From here on out, it's going to get even more fun and complicated!
Until next time.
Saturday, February 26, 2011
Friday, February 18, 2011
Life Drawing for Animation: Final Project
Now for the final project! I broke this down into two separate posts for two reasons. Firstly, there were supposed to be a total of 30 drawings for this project, and if I had to include even more drawings in that last post it would have been a very long post. Secondly, by combining the drawings in one post, I believe that you'll be able to better see the progression, not only of the animation and how it would look, but also of the growth in my ability to see the proportions of the human figure.
The final project for this class was relatively simple: Draw 30 frames of a human figure going through a set of motions while keeping consistent proportions and details. Every week, we were required to draw 7-8 rough sketches of our figure, with the final project being a redrawing and animation of those "frames." I have divided the sketches based on the week they were drawn, so that you may be able to see the progression of my drawing skills.
The final project for this class was relatively simple: Draw 30 frames of a human figure going through a set of motions while keeping consistent proportions and details. Every week, we were required to draw 7-8 rough sketches of our figure, with the final project being a redrawing and animation of those "frames." I have divided the sketches based on the week they were drawn, so that you may be able to see the progression of my drawing skills.
First week
Second week
Third week
Fourth week
After creating the initial drawings, the final step was to redraw the sketches and create a portfolio-worthy "animation." Being the technical guy I am, and wanting to have a chance to play some more with the VisTablet I bought, I opted to draw the figures in Photoshop, which I would then use to animate.
Rather than posting each of the individual drawings (which would probably overload this blog), I am instead posting the final .gif version (click to watch):
Not too shabby, eh? :-P I was pretty pleased with it. It certainly looks a lot better than the original sketches.
And that's a wrap for Life Drawing and Animation! Up next: Computer 3D Modelling and Animation I. *insert extremely excited face here*
Until next time.
And that's a wrap for Life Drawing and Animation! Up next: Computer 3D Modelling and Animation I. *insert extremely excited face here*
Until next time.
Drawing the Human Figure...Not So Easy, Actually.
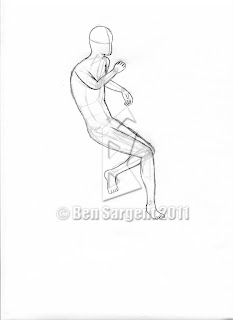
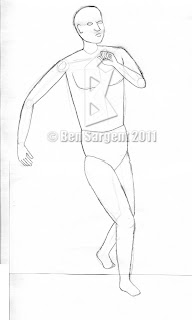
Hey all! I apologize for the long hiatus this blog took. The class that I was taking ate up a lot of my time and, quite frankly, I didn't feel that any of the drawings I did should ever be posted. Not that they were completely horrible, but I didn't feel that they were on a par with the rest of the drawings that I have posted on this site. Nevertheless, this blog is intended to document my progress, so I need to swallow my pride and post what I've done. This post will deal with the regular weekly assignments (the gesture and timed drawings), and I will post another entry later that will deal specifically with the final project and the various drawings that were part of it. Anyway, enough talk! Now for the drawings.
The following fifteen drawings are all part of the same assignment. Like the one from the previous week, we were required to create 15 gesture drawings. Unlike the previous week, they all needed to start displaying characteristics of real human figures, like faces, hands, etc. As you can see, drawing people is NOT my strong point.
The next 15 drawings were yet another timed assignment. The first 5 were 1-minute, second 5 were 3-minute, and the last 5 are 5-minute.
Week 2
 |
| Gesture drawing, timed: 3 minutes |
 |
| Gesture drawing, timed: 5 minutes |
Week 3
The following fifteen drawings are all part of the same assignment. Like the one from the previous week, we were required to create 15 gesture drawings. Unlike the previous week, they all needed to start displaying characteristics of real human figures, like faces, hands, etc. As you can see, drawing people is NOT my strong point.
 | |
|
 |
| Gesture drawing, timed: 3 minutes |
 |
| Gesture drawing, timed: 5 minutes |
Week 4
 |
| Gesture Drawings - More of the same, really. As you can see, my figure building has improved somewhat, but all in all the poses are still not 100% |
The next 15 drawings were yet another timed assignment. The first 5 were 1-minute, second 5 were 3-minute, and the last 5 are 5-minute.
Week 5
Gesture Drawings: These following drawings were gestures that placed an increased emphasis on the position of the head. At about this time I got a Ken doll, which I used for modeling. This helped me see the proportions much more easily, and I think it shows in my drawings.
 |
| Gesture drawing, timed: 1 minute |
 |
| Gesture drawing, timed: 3 minutes |
 |
| Gesture drawing, timed: 5 minutes |
Aaaand that's that! I'll post another blog soon with the final project. See you soon!
Until next time.
Subscribe to:
Comments (Atom)


